Amazon Listing Optimization Case Study: How we Increased CVR by +30%
 X
X

SavePod is a K-Cup pod maker that uses paper pods instead of plastic, offering the convenience of K-Cups without the environmental impact.
Believing their Amazon listing fell short, SavePod partnered with SellerMetrics for a complete Amazon listing overhaul.
01
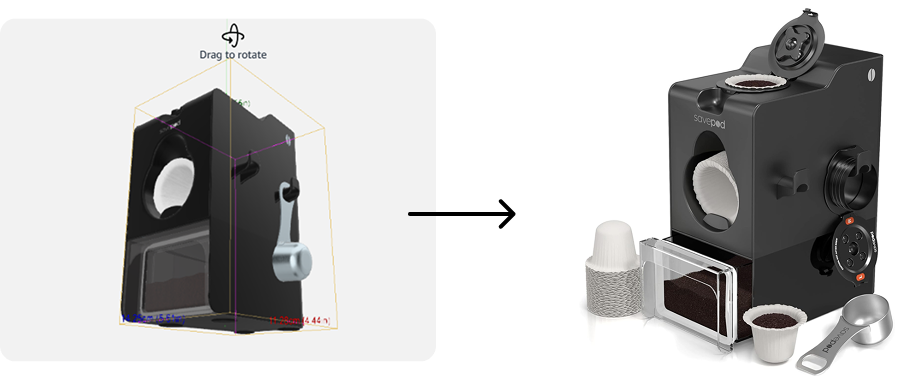
Creating 3D Product Renderings
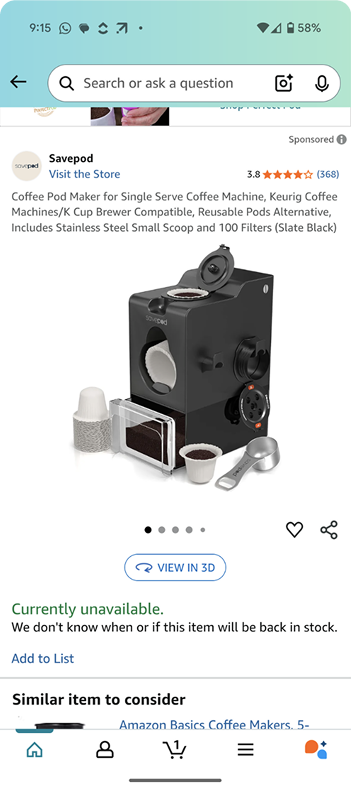
We found the original product image to be low quality, with fuzzy edges and poor lighting. Our creative director and 3D designer recommended using advanced 3D rendering to significantly enhance its quality
02
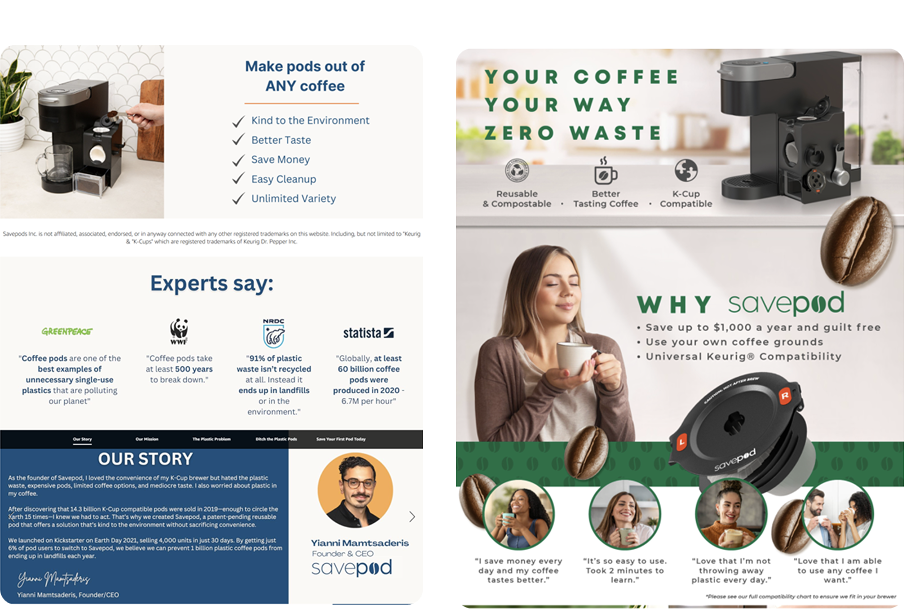
Brand Refresh
We updated the brand with a green color scheme and more lifestyle imagery to evoke an eco-friendly, relaxed vibe.
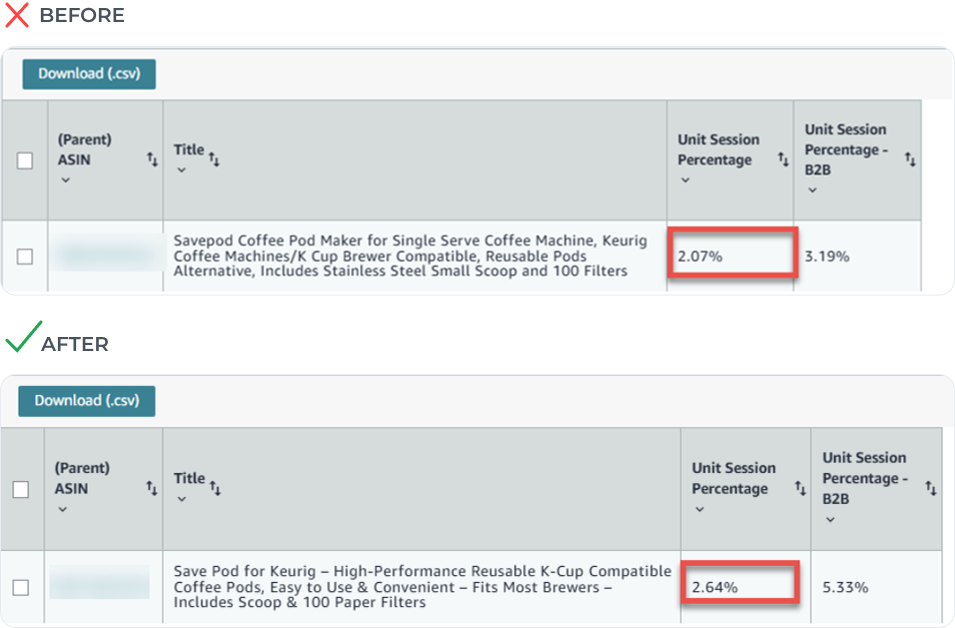
❌ Before
✅ After
04
A+ Premium Content Creation
We updated the brand with a green color scheme and more lifestyle imagery to evoke an eco-friendly, relaxed vibe.
❌ Before
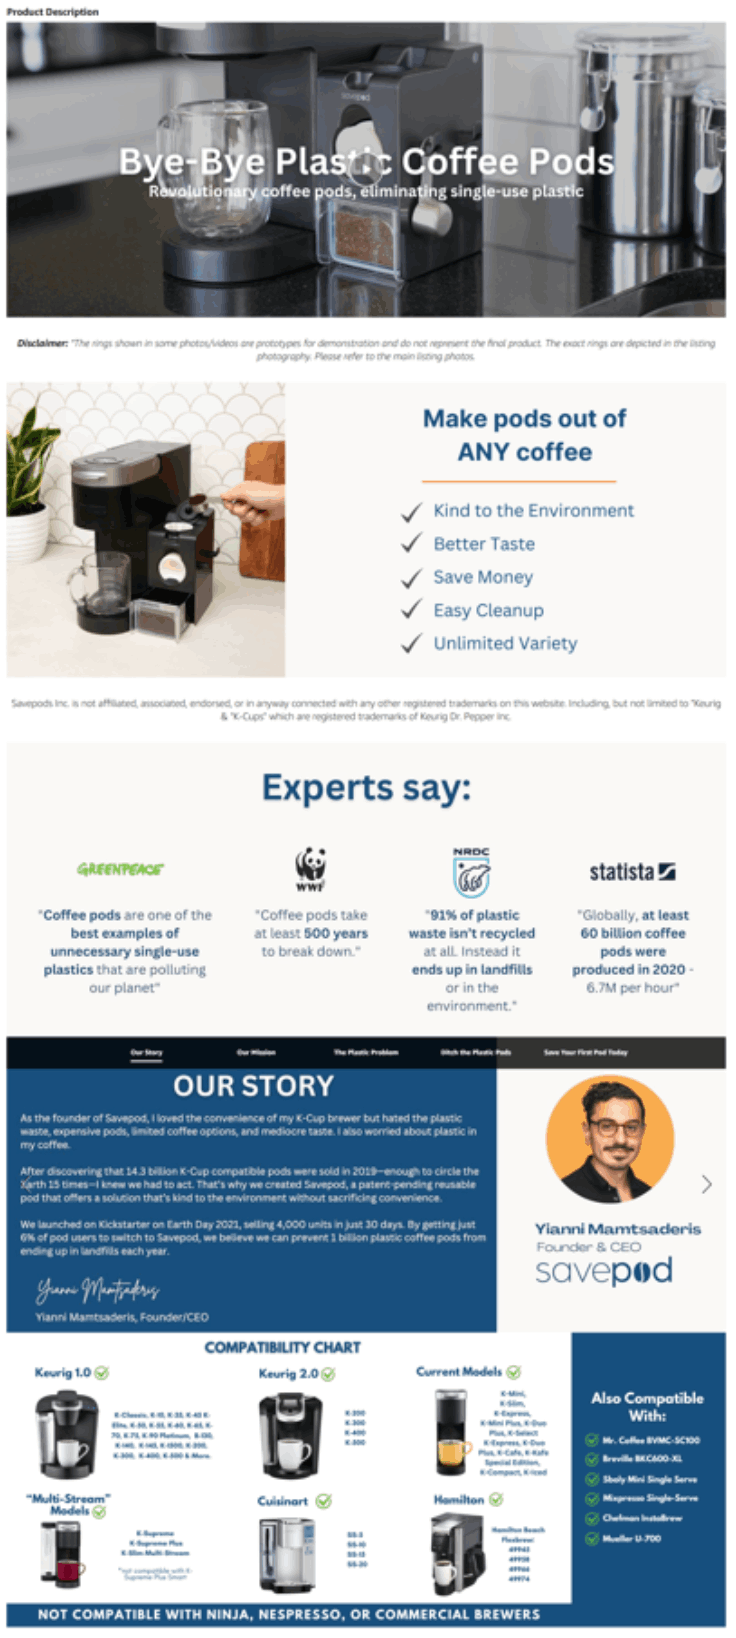 ✅ After

05
Amazon Listing SEO Enhancements
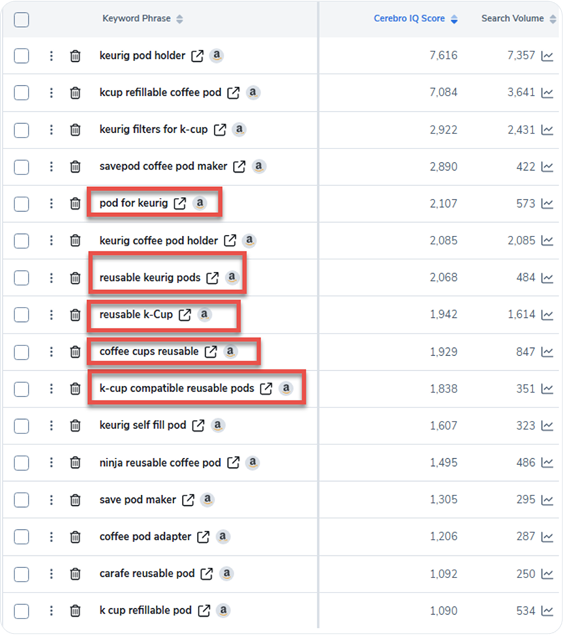
We researched and seeded high-intent keywords into the listing to make the listing more discoverable to our target audience.
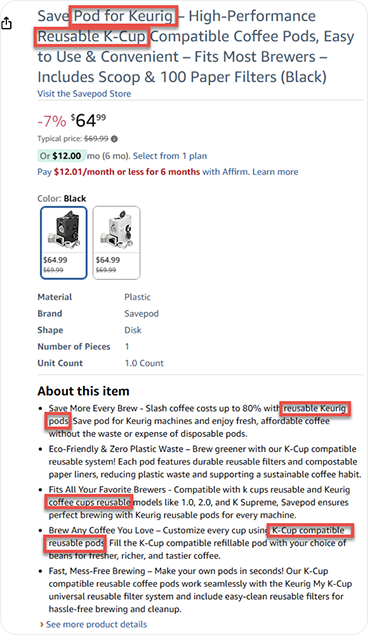
06
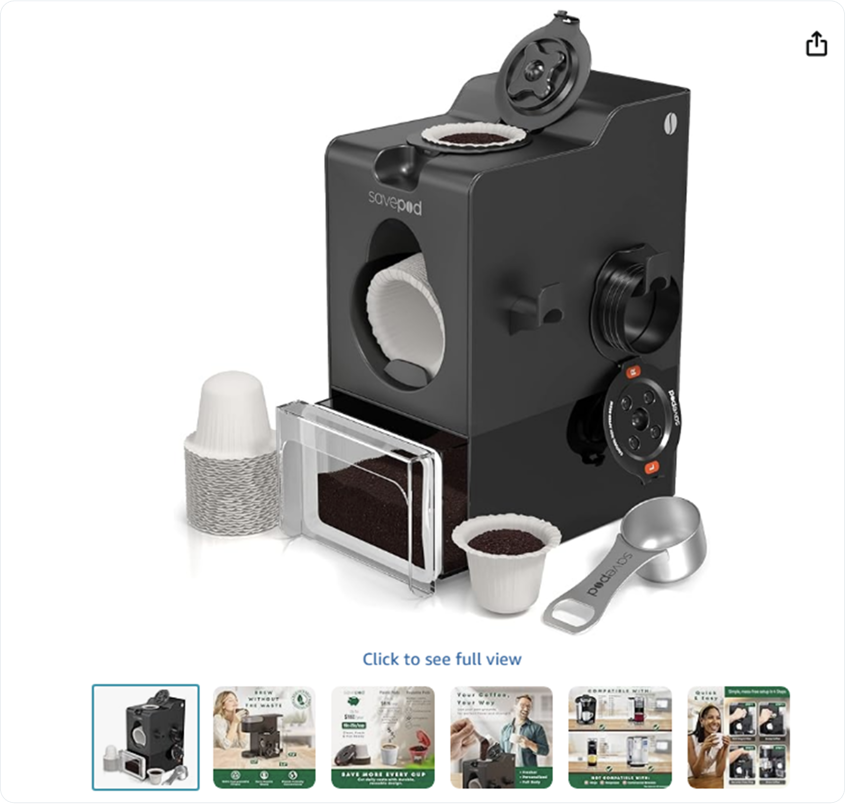
Main Product Listing Image Update
Our new image features sharper edges, eliminates the yellow lighting tint, and uses more white space, making the product appear larger on mobile.
❌ Before

✅ After
07
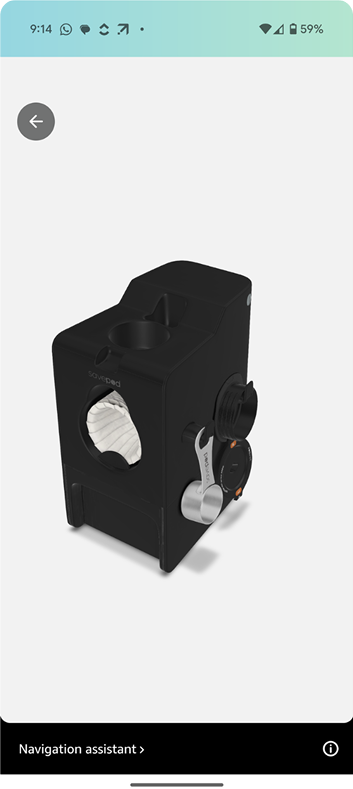
Bonus: 3D Model Creation
We use a 360° 3D model that lets mobile users view the product in 3D and place it in their real environment using augmented reality.
FINAL
Business Impact
After launching the revamped Amazon listing, the client was thrilled to see both a visual upgrade and a clear performance boost — with conversion rates rising from 2.07% to 2.64% (+30%) and an additional $3,000 in monthly sales.
Want Results Like This
In Your Business?
FAQ for Amazon Product Listing Optimization Services
1. What is Amazon Product Listing Optimization?
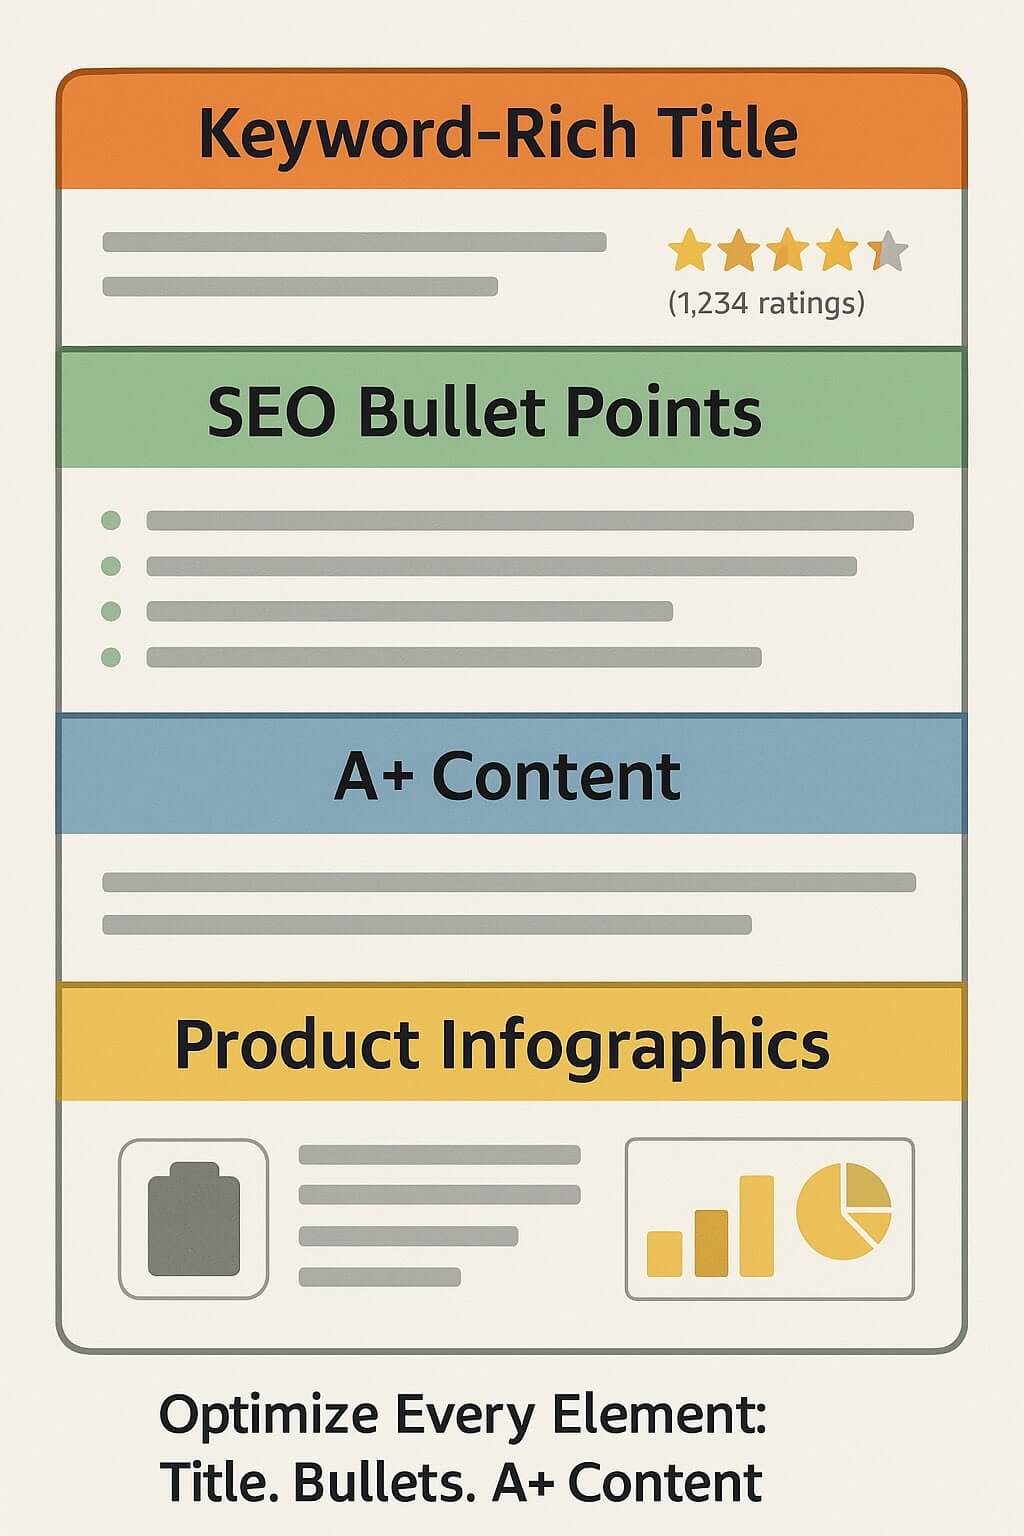
Amazon Product Listing Optimization describes the process of enhancing various elements of Amazon product listing—such as product titles, bullet points, A+ Content, keywords, product images, videos or infographics to improve visibility, search rankings, and conversion rate.
2. Why is product listing optimization important for Amazon sellers?
Optimized listings are more likely to rank higher in Amazon search results, attract more clicks, and convert more visitors into buyers. Better quality listings will also improve the efficiency of your Amazon ads.
3. What services are included in Amazon listing optimization?
Our services include keyword research, competitor analysis, title optimization, bullet point and description enhancement and depending on the service package that you select also product image and video creation.
4. Can you help create A+ Content?
Yes, we can assist in creating and optimizing A+ Content to make your product pages more engaging, informative, and visually appealing, which can improve conversion rates.
5. How do you optimize Amazon product titles?
We optimize product titles by incorporating relevant keywords, optimizing the title length for desktop and mobile search results, as well as communicating important product features.
6. What role do images and videos play in listing optimization?
High-quality images and videos are crucial for showcasing your product’s features and benefits. Potential customers will often use images and videos to better understand product features and specifications.
7. Can you help improve my product’s search rankings on Amazon?
Yes, through strategic keyword optimization, we can improve your product’s search rankings on Amazon, making it easier for potential customers to find and purchase your product.
8. How long does it take to see results from listing optimization?
This depends on a lot of factors, such as the competitiveness of your product niche, the number of user reviews your listings have, the strength of your brand, the quality of existing listings and so on.
Contact us to get a free assessment and consultation.
9. Is listing optimization a one-time service or ongoing?
Think of listing optimization as seasonal activity: While the initial optimization is key and will likely deliver the greatest impact you will eventually reach a point where sales plateau or even start dropping. When that happens you should go through another listing optimization cycle.
10. Why should I hire SellerMetrics as my Amazon Listing Optimization agency?
We have years of experience optimizing listing and have acquired expert knowledge in many product categories. This enables us to make informed decisions as to which keywords are realistic ranking targets, as well as quickly identify blindspots in your existing listing copy and product visuals. This helps you save time and ensures that your listings are optimized to their fullest potential.
11. Can you handle campaigns for both new and existing products?
Yes, we have extensive experiences launching new Amazon brands, as well as optimizing and scaling mature ad accounts.
Get in touch with us so that we can review your situation and provide a tailored listing optimization strategy.